Do it yourself
Life hacks, master classes, useful tips, recipes.
home » Electronics » Ultra-simple level indicator without transistors and microcircuits

There are circuits of simple signal level indicators that do not contain transistors or microcircuits. They don't even require a power source to operate. And the time spent on assembly will not exceed 20 - 30 minutes. Although, to be honest, the end result will be a simple light and music design, for example, speakers. There is no need to talk about the accuracy of such indicators. Let's put together one of the most common schemes that roam the Internet.

Making a level indicator without transistors and microcircuits

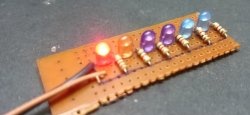
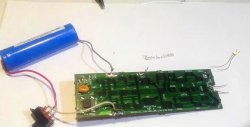
Considering the simplicity of the circuit and the minimum of parts used for the indicator, the device can even be assembled using wall-mounted installation. But if you are not lazy and make at least the simplest printed circuit board, then your homemade product will look more complete, more stylish. Let's start assembling.

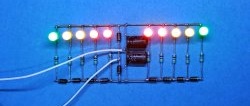
For greater visual effect, it is better to take multi-colored ones. LEDs. Typically, indicators use three colors: green, yellow and red. Let's not “reinvent the wheel”; the indicator will comply with the canons.

To limit current LEDs will be required resistors. Their denomination 470 Ohm. The parts are installed on the board and soldered. Now it's your turn diodes. Used 1N4007.

A kind of “ladder” is assembled from them, at each “step” of which the voltage drop will be about 0.3 Volts. And the corresponding one will light up Light-emitting diode.

In addition to the indicator part itself, you will need an input voltage doubler. It is assembled from two diodes and two electrolytic capacitors. Well, that's all. Now check.

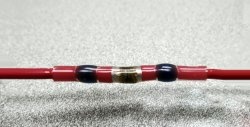
The signal supplied directly from the output of the MP3 player is not sufficient for the indicator to work.

Required ULF.

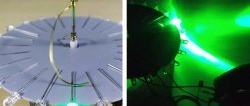
It is convenient to remove the signal from the speaker terminals. Multi-colored lights flash to the music. The device is working.

Watch the video

come back
Comment
  • bowtiesmilelaughingblushsmileyrelaxed relaxedsmirk
    heart_eyeskissing_heartkissing_closed_eyesflushedrelievedsatisfiedgrin
    winkstuck_out_tongue_winking_eyestuck_out_tongue_closed_eyesgrinningkissingstuck_out_tonguesleeping
    worriedfrowninganguishedopen_mouthgrimacingconfusedhushed
    expressionlessunamusedsweat_smilesweatdisappointed_relievedwearypassive
    disappointedconfoundedfearfulcold_sweatperseverecrysob
    joyastonishedscreamtired_faceangryragetriumph
    sleepyyummasksunglassesdizzy_faceimpsmiling_imp
    neutral_faceno_mouthinnocent
3+three=
Comments (1)
  1. ino53
    #1 ino53 Guests 8 August 2023 23:18
    0
    Let's put together one of the most common schemes that roam the Internet.
    Yes, this is an ancient scheme, but is it worth further deforming it? (I wanted to insert and show the first lines from the schema search engine - I couldn’t worried ) I won’t criticize the board - well, the person was too lazy to drill the hole.for parts intended for installation specifically in the holes, anyway, they will not immediately fall off. Another thing that killed me was the use of a thousand-volt one-ampere diode with Fgr 60 Hz in the mode of units of volts, tens of milliamps and the audio range, i.e. more than 10 kHz. And the statement about 0.3 V when the datasheet is approximately 0.65 V (Well, I can’t insert a picture! anguished ) something like that... In short, with this approach you can only write on the fence! smile

How to make a vice without welding with your own hands

Coffee panel for the kitchen | Do it yourself

Master class icon of the Holy Healer Panteleimon | Do it yourself

If your Dremel breaks, it doesn’t matter: a grinder can replace it

«Do it yourself - with your own hands» - a site of interesting homemade products made from scrap materials and items at home. Step-by-step master classes with photos and descriptions, technologies, life hacks - everything a real master or just a craftsman needs for needlework. Crafts of any complexity, a large selection of directions and ideas for creativity.

We recommend reading

Washing machine error codes