Do it yourself
Life hacks, master classes, useful tips, recipes.
home » Useful and interesting » Lifehacks and useful tips » Straightening out dents on the speaker cap
Straightening out dents on the speaker cap

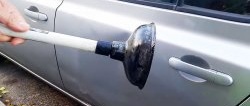
Nowadays, a lot of speaker systems are made with open dynamic heads. Their diffuser does not protect anything, neither the mesh nor the grille. Of course, there are speakers with a removable panel, but this is a different case. Also, when transporting individual speakers, you can inadvertently press on the bulge in the center, which is called the dust cap. Based on the name, I think it’s clear what it serves.
And if handled carelessly, this cap can become wrinkled and pressed inward.
Straightening out dents on the speaker cap

Of course, this is not critical and most likely will not affect the sound quality. But how beautiful it is, especially when the speaker is open to the visual eye.
Straightening out dents on the speaker cap

But don’t despair, as this minor defect is quite easy to fix.

Will need


To do this, take the following tools:
  • Pliers.
  • Thin needles.
  • Black permanent marker.

Straightening out dents on the speaker cap

I hope it won't be difficult for you to find all this.

Removing dents on the dust cap


The first step is to bend the tip of the needle, making an improvised poker.
Straightening out dents on the speaker cap

The bend angle is approximately 45 degrees.
Straightening out dents on the speaker cap

Be careful, if your needles do not bend and break, then try annealing the tip on a gas burner, it should become softer.
We take the modified needle and carefully stick it into the dent, but not into the very center, but closer to the edge.
Straightening out dents on the speaker cap

We turn it a little and try to pull out the depressed area.
Straightening out dents on the speaker cap

Sometimes one puncture is not enough, so you may need to do another one.
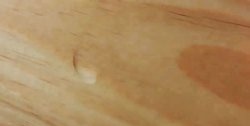
As a result of manipulation, the needle entry holes may change color and become noticeable.
Straightening out dents on the speaker cap

Color them in with a black marker.
Straightening out dents on the speaker cap

Straightening out dents on the speaker cap

Your speaker is aesthetically pleasing again.
Straightening out dents on the speaker cap

Straightening out dents on the speaker cap

And the punctures are practically invisible, anything is better than a dented cap.
Straightening out dents on the speaker cap

Watch the video


come back
Comment
  • bowtiesmilelaughingblushsmileyrelaxed relaxedsmirk
    heart_eyeskissing_heartkissing_closed_eyesflushedrelievedsatisfiedgrin
    winkstuck_out_tongue_winking_eyestuck_out_tongue_closed_eyesgrinningkissingstuck_out_tonguesleeping
    worriedfrowninganguishedopen_mouthgrimacingconfusedhushed
    expressionlessunamusedsweat_smilesweatdisappointed_relievedwearypassive
    disappointedconfoundedfearfulcold_sweatperseverecrysob
    joyastonishedscreamtired_faceangryragetriumph
    sleepyyummasksunglassesdizzy_faceimpsmiling_imp
    neutral_faceno_mouthinnocent
3+three=
Comments (8)
  1. Denis
    #1 Denis Guests 5 October 2018 14:03
    5
    Why spoil the speaker like that if you can do the same thing with a vacuum cleaner?
  2. Guest Alexander
    #2 Guest Alexander Guests 5 October 2018 14:38
    3
    What about the vacuum cleaner??? And everything will be more accurate and without punctures.
  3. Zakhar
    #3 Zakhar Guests 5 October 2018 14:57
    5
    I use a vacuum cleaner to correct these types of defects.
  4. Mister Scotch
    #4 Mister Scotch Guests 5 October 2018 18:34
    1
    There's also tape!
  5. Guest Mikhail
    #5 Guest Mikhail Guests October 9, 2018 09:43
    0
    I've been using a vacuum cleaner all my life.If it didn’t help, especially if the cap was aluminum, apply a little solvent around the edge, peel it off, straighten it, and glue it on. And in general, this is not just hardwired - it is part of the speaker emitter. Try covering it with something else and compare the sound.
  6. Guest Alexander
    #6 Guest Alexander Guests October 10, 2018 02:21
    2
    In fact, this method is crap. By the way, you can use a vacuum cleaner, but there is too much power - you can tear off the cap and damage the entire diffuser. In actual fact, the appropriate one is selected. the diameter of the tube (yes, at least from a vacuum cleaner, if you wash it..) leans against it and by inhaling into itself, almost any caps are pulled out at once...
    And then it looks even and smooth, and not like it was picked from the inside with a needle. If it doesn’t suck, then use a vacuum cleaner :)
  7. Guest Sergey
    #7 Guest Sergey Guests 2 November 2018 15:01
    1
    The holes, of course, need to be sealed. Alexander has already written about the use of tubes here, but it is advisable to select them by diameter. I repeatedly corrected this with my lips. The method is working.

Dehumidifier | Do it yourself

Self-centering jig for adding dowels

New Year's horseshoe | Do it yourself

Decor idea for New Year's holidays | Do it yourself

«Do it yourself - with your own hands» - a site of interesting homemade products made from scrap materials and items at home. Step-by-step master classes with photos and descriptions, technologies, life hacks - everything a real master or just a craftsman needs for needlework. Crafts of any complexity, a large selection of directions and ideas for creativity.

We recommend reading

Washing machine error codes